Monday, October 17, 2011

Vegan Pumpkin Cinnamon Rolls

One thing about fall that I love is pumpkin. These delicious babies are also vegan <3 so grab a baking pumpkin or if you must a can of pumpkin mush ...no never mind, go for the real stuff and bake these cinnamon rolls .


Vegan Pumpkin Cinnamon Rolls
makes 10 cinnamon rolls

Print this recipe!

Ingredients:
2 tbsp Earth Balance buttery spread
1/3 cup almond milk
1/3 cup pumpkin puree
1/4 cup sugar
1 tbsp chia seeds + 3 tbsp warm water
1 (1/4th oz) package dry yeast
2 cups all purpose flour
1 tsp cinnamon
1/2 tsp salt
1/2 tsp ground nutmeg
1/4 tsp allspice
1/4 tsp ground cloves
1/8 tsp ground ginger
filling:
1/4 cup brown sugar
2 tbsp Earth Balance buttery spread, softened
2 tsp cinnamon
for glaze:
1 cup powdered sugar
1 tbsp almond milk
1/4 tsp vanilla extract
Heat the almond milk and the Earth Balance together in a small pan on the stove over low/medium heat until the Earth Balance melts and the milk is warm to the touch. Remove from heat, sprinkle in the yeast and stir so yeast will dissolve. Let yeast mixture sit for five minutes (it will look very creamy after a few minutes).

Meanwhile, combine the pumpkin and chia mixture (when you combine the chia seeds and water be sure to let the mixture sit for five minutes to gel a little bit). In another bowl whisk together the flour, sugar, salt, cloves, cinnamon, ginger, nutmeg and allspice. Add flour mixture to the pumpkin. Pour in yeast.

Knead dough by hand for about 10 minutes or with a KitchenAid for six on medium speed with either a paddle attachment or dough hook. The dough should be smooth and elastic when you’re done.
Place dough in a greased bowl, cover with a dishcloth and set in a warm area to rise for 1 hour 15 minutes. While the dough is rising, mix together the softened Earth Balance, brown sugar and cinnamon in a small bowl.

Remove dough and punch dough on a lightly floured surface. Roll out to a large rectangle and spread brown sugar mixture on top keeping an inch bare around the sides. Gently roll up dough so it resembles a log. Slice dough into 1/2 inch slices and place in a greased 9-inch casserole dish. Cover with a dishcloth and let rise for another 45 minutes.

Preheat oven to 350 degrees. Bake rolls for 25 minutes. Let cool while you make the glaze.
For the glaze, mix together the powdered sugar, almond milk and vanilla extract. If glaze seems too runny, add a little more powdered sugar. Place glaze in a small plastic bag and snip the tip off. Make swirls over the cooled rolls and serve.

Time:
3 hours

Friday, October 7, 2011

Doughnuts- The new trend.

If there is one that that I crave during the rainy weather, its those warm, soft, sweet and sometimes chocolatey things called doughnuts. I've noticed they have become popular on tables and why not? Doughnuts are one of those items that bring us back to our childhoods or reminds us that after we work out we must consume something unhealthy okay maybe that's just me. Either way check out these lovely inspirations


Wednesday, August 31, 2011

Feathers

There is a popular trend; feathers. I had feathers in my wedding and I've seen feathers of all shapes and sizes at weddings, showers and events. I just LOVE them


Photo Credit:
Row 1: Jak and Jil via Style.com | Feathers via Pinterest
Row 2: Earrings via Weheartit
Row 3: Bobby Pins via Etsy | Hairpiece via Etsy

Saturday, August 20, 2011

DIY- Candy Apple Bar


With fall fast approaching I can not help but think of apples. Many of you Brides and wedding planners are already in full planning mode coming up with color schemes. I came across this fantastic sweet treat idea and had to share it. With the added elements of nature, it really brings the rustic fall feeling.
Here is a recipe on how to make Candied Apples.

Ingredients:

  • 8 apples
  • 8 wooden skewers
  • 2 cups granulated sugar
  • 1 cup light corn syrup
  • 1/2 cup hot water
  • 1/2 cup red cinnamon candies, like Red Hots

Preparation:

1. Prepare a baking sheet by lining it with aluminum foil and spraying the foil with nonstick cooking spray.
2. Wash and dry the apples carefully. Remove the stems, and stick the skewers firmly in the stem ends.
3. Combine the water, corn syrup and sugar in a medium saucepan over medium-high heat. Stir until the sugar dissolves, then continue to cook, without stirring, until mixture reaches 250 degrees. Wash down the sides of the pan with a wet pastry brush occasionally to prevent crystallization.
4. Once the candy reaches 250, add the cinnamon candies and stir briefly to incorporate. Continue to cook, washing down the sides, until it reaches 285 degrees.
5. Remove from the heat and stir the candy so that it is smooth and even. Hold an apple by the skewer and dip it in the candy, tilting the pan at an angle and rotating the apple to cover it completely with a smooth, even layer. Bring it out of the candy and twirl it to remove excess, then set it on the prepared baking sheet. Repeat with remaining apples.
6. Allow apples to cool at room temperature. Candy apples are best enjoyed within 24 hours.

Wednesday, August 10, 2011

The Proposals, Weddings and Photography GIVEAWAY Winner


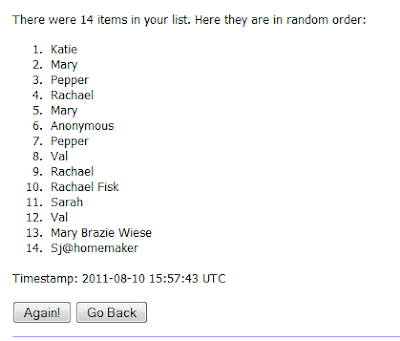
Announcing the WINNER of the Proposal, Weddings and Photography giveaway. They married in a courthouse and haven't found the time or money to have another wedding.

Now is your chance Val, Congratulations!!


To claim your prize you must comment on this blog and message me for details.

A BIG Thank You to Elaine Turso Photography, The Kooky Baker and Rocha Floral Design for donating to this giveaway. 


Friday, August 5, 2011

Real Elopement Wedding~ Carol and Lannie

I'm a very BIG believer that you can have a beautiful and memorable wedding if you use the right resources and have a great photographer. Pictures create a lasting memory of a moment that may fade in memory if it were not for a photo.
Having a small elopement is something that is very intimate and can be created to be more YOU. Instead of worrying about pleasing your guests and making it the 'IT' wedding, you can focus on what is more important; your new life together as husband and wife.

Carol and Lannie choose to have an elopement wedding because they wanted to have something that was all about them.


Many people have a hard time within with having a small wedding thinking about that family that might not be there, but you will be very surprised how supportive your family might be in your decision to have an Elopement Wedding.


One of the positives of having an Elopement wedding is you can focus more of your money on the reception or honeymoon. I can not wait to plan a intimate reception dinner like this....


You have have a wedding like this for under $3,000. All you need is a good Elopement Planner and an Excellent Photographer. You can get a chance to win this kind of ceremony until Aug 10th, with the add ons we have available we can create a wedding that is uniquely yours.


Photo Credits: Dove Wedding Photography

Monday, July 25, 2011

It's a GIVEAWAY!! Proposals, Weddings and Photography...OH MY!

I am so excited to introduce to you all this fantastic Giveaway ! We've partnered up with Kitsap counties finest women entrepreneurs to bring you this coveted package.

One lucky winner is going to win their choice of either:

1)- The "They met, fell in Love, now it's time to Ask"  Package:
When she announces your engagement she is going to tell all her friends, your family, her family, your kids and grand children of how you became engaged. Create your dream proposal that she will tell everyone about.
*We have the up most discretion when it comes to proposals*

2)- A custom Wedding package which includes
  • Personalized officiant services and ceremony at a location of your choice
  • Romantic Ribbon and candlelight ceremony decor
Think....


  • A custom 6 inch Wedding Cake OR 2 dozen Wedding Cupcakes from The Kooky Baker


  •  Embossed Keepsake Wedding Certificate 

OR

3) Become the Faces of LadySunshinEvents.

You would our spokemodels for the site. With that, Elaine Turso Photography and LadySunshinEvents would test out all kinds of concept photo shoots, including marriage proposals, engagements, weddings, wedding fashions, trash the dress, etc


WHEEWW! That is simply amazing!

To enter to win one of these wonderful giveaways....


-Visit www.ladysunshinevents.com and come back here and tell us your favorite thing about LadySunshinEvents and why you think you should win.


- For the second entry, go to LadySunshinEvents, Elaine Turso Photography and The Kooky Baker's Facebook page and 'Like' the pages. Leave us a comment telling us about your entry.


-For the third entry, share the LOVE about this giveaway. Leave us a separate comment here letting us know where you shared.


There are THREE possible ways to increase you chances. Contest ends August 8th at midnight.

Random.org will help us with the selection of the winner; the winner will be announced on Aug10th. The Proposal, Wedding or Photo shoot needs to take place on or before Sept 9th 2011

Thursday, July 21, 2011

Cori & Paul ~ Train Wedding

"He asked, She said Yes, We eloped" Perfect! I am a sucker for non traditional weddings and beautiful pictures that show the expression of love the couple has for one another. Check out Cori & Paul's ELOPEMENT wedding on a train.

Photo credit: Amanda Borozinski

There are so many non traditional and creative ways to get married that people do not think about. You can still have a magical wedding day even if you decide to elope on a train , in a country greehouse, the woods, or on a roof. Eloping kinda saves the money you would have spent on a large wedding to use for a reception instead ;)

LadySunshinEvents is a Elopement weddings~Dessert table~Event company that specializes in Elopement weddings. We have pre-designed elopement packages that you can custom tailor to fit your desires and needs. The sky is the limit :)

Friday, July 1, 2011

Am I strong enough?

One thing that I have learned from Navy Sub life.... You have to be strong.

As a wife of a U.S Sailor and a mother of three, boys mind you. I often find myself being a single-non single parent for months at a clip. Those months apart are most challenging, the car will decide it no longer wants to work right, some household appliance will break down, your house gets torn apart from kids because there is no way you can be in four rooms at the same time to prevent disasters, emails are few and far between and almost always monitored by someone and if you're an unlucky one like some from our boat, the emails will be read and talked about with people who have no reason to know what was in it at all, you're deprived of sex and think about taking up stock in batteries, you learn what deployment insomnia is and you'll mumble and grumble "why does this only happen when he's gone?"

I'm also a person that NEEDS to stay busy, which I think might add to some of my stress. As a 7 1/2 month pregger I decided to re-paint the entire inside of our house....while he was at sea. I picked up armature photography, quilting, scrapbooking, couponing, gardening, baking, pretty much I strive to be a Martha Stewart clone minus the prison time.  I often have about 3 things I'm working on, right now it's a cathedral quilt, canning/baking, prepping to take senior pictures and the most time consuming...starting a business. Although I have my husbands full support and willingness to listen to my never ending talk about vendors, marketing and the future, he still isn't there to be 100% supportive.

Sometimes I get the "uh huh" or "oh cool" monotone response, I get upset but then have to remember that this man is putting in a 12hr shift of craziness known as Navy life. He is the only unfortunate person on his boat to be in 3 divisions and is tasked numerous things beyond the norm. I try to stay positive and supportive all while masking my own frustrations of the days business.

The pressure will build up over weeks and explode into a 'I'm not gonna cook you lil jerks anything to eat, go eat a bowl of cereal and mom is gonna go sit in the shower for 2 hrs, you better not bug me or mommy dearest will come out' mess(you like my run on sentence? good because I did). The kids sit there looking at each other trying to figure out why mommy has gonna coo coo.

I wonder sometimes how strong am I really? Can I really do this? Then I look at all the pictures in my house, I look at my husband, my children and know I not only have to be strong for me I have to do it for all of them......So I suck back all my emotions and frustrations and go through another day of a Navy Sub life.

These are all my knuckle heads :-)


What Navy tales do you have that makes you wonder "am I really strong enough for this?"

Thursday, June 30, 2011

Cherry Butter

Cherries have exploded in our house!!! There is cherry guts, cherry nuts, cherry blood lol... A local farmer provided us here in town with delicious Bing and Rainier cherries (Thank you guys). I bought 25lbs,yep that's right 25.What can you do with 25lbs of cherries?!!!
Here is what I made:
Cherry pie filling
Cherry Jam
Dehydrated cherries
Maraschino cherries
Candied cherries
and the feature for tonight..........

Cherry Butter


INGREDIENTS:

4 Cups pitted and pureed cherries
3 1/2 cups granulated sugar
3 T. butter
1/2 t. cinnamon
1/4 t ground allspice
1/2 t. almond extract
1/2 cup lemon juice
1 packet of Sure-jell pectin OR 10T. classic pectin


1) Wash and pit cherry
2) Combine cherries and sugar over med heat. Stir constantly until a roaring bubble, you don't want to burn the bottom.
3) Reduce to low heat. Stir in butter, spices and extract.
4) Add lemon juice and pectin, stir until well combined, about 5 minutes.
5) follow you basic water canning instructions


I'm sure you can do with out the pectin but I like the jell consistency. The next batch of butter I might also try adding a little more butter to the mixture as well.

This is one of the most amazingly tasty butters there is....seriously. Like I'm gonna have some for breakfast tomorrow morning. After you try this, let me know how it turned out for you.


Photo source:
applesandbutter
savvy eats

Monday, June 20, 2011

Strawberry cupcakes with Meringue butter cream

I went on a strawberry kick and bought 8lbs of these berries!! So after eating about 2lbs myself I decided I would make some yummy treats for family and friends. Now keep in mind this is a meringue butter cream so its a lot different than basic butter cream  (I actually like this kind much better)


 Strawberry Cupcakes:

Ingredients

  • 2 3/4 cups all-purpose flour
  • 1/2 cup cake flour, (not self-rising)
  • 1 tablespoon baking powder
  • 1 teaspoon salt
  • 8 ounces (2 sticks) unsalted butter, softened
  • 2 1/4 cups sugar
  • 3 large eggs
  • 1 large egg white
  • 1 cup whole milk
  • 1 1/2 teaspoons pure vanilla extract
  • 2 cups finely chopped strawberries, plus small strawberries for garnish

 Meringue Butter Cream Icing:

Ingredients

  • 4 large egg whites
  • 1 1/4 cups sugar
  • 1 1/2 cups (3 sticks) unsalted butter, room temperature, cut into tablespoons
  • 1 teaspoon pure vanilla extract
  • 1 1/2 cups (12 ounces) strawberry jam, pureed in a food processor

Directions

  1. In the heatproof bowl of an electric mixer set over a saucepan of simmering water, combine egg whites and sugar. Cook, whisking constantly, until sugar has dissolved and mixture is warm to the touch (about 160 degrees).
  2. Attach the bowl to the mixer fitted with the whisk attachment. Beat the egg-white mixture on high speed until it holds stiff (but not dry) peaks. Continue beating until the mixture is fluffy and cooled, about 10 minutes.
  3. Switch to the paddle attachment. With mixer on medium-low speed, add butter several tablespoons at a time, beating well after each addition. (If frosting appears to separate after all the butter has been added, beat on medium-high speed until smooth again, 3 to 5 minutes more.) Beat in vanilla. Beat on lowest speed to eliminate any air bubbles, about 2 minutes. Stir in strawberry jam with a rubber spatula until frosting is smooth.

    The source: Martha Stewart :) 


Saturday, June 11, 2011

DIY Saturday- Picture Notepad

At the first part of the year I participated something called "Pay It Forward 2011". Those that responded to it was to home make something and send it to 5 people. Each of those 5 people are to make something and send it to another 5 and so on. I'll admit I JUST now started making my pay it forwards for this year ( but hey I do have all 2011 to make stuff ).

With my oldest Graduating Pre-K I wanted to make something for his teacher and also figured I would knock out a Pay It Forward at the same time.


WHAT YOU NEED:

  • 2 Vertical 4x6 picture's 
  • Asst Paper 
  • Paper cutter or x-acto cutter
  • Clothespins or 2 binder clips
  • Elmer's white glue
  • Heavy books 
( I made a smaller size- 3x4)
STEP ONE: TRIM PAPER TO SIZE

Cut each paper into a 4x6 (same size as your photo's). I used a paper cutter which is much faster and easier but you may also use a ruler and x-acto knife.
You want your stack to be about 1/4 inch.


STEP TWO: GLUE PAPER


Tap the stack of paper until one side (short end)  is perfectly flush.
Clamp with clothespin or binder clip to keep the paper nicely lined up.
Apply glue evenly to short end and smear with finger.

STEP THREE: GLUE AGAIN AND ......AGAIN. 

Let the glue dry for about 10-15 minutes. Then re- apply glue and let completely dry. The layer of glue should be nice and thick (re-apply one more coat if needed and completely dry).
Ruffle the pages to make sure all is secure. If they do come loose apply more glue and let dry.

Place the print face out on top n bottom and re-clamp with clothespins or binder clip.

Sorry about the lighting change
STEP FOUR: MAKE THE PAPER STRIP

For the spine of the notepad cut a 4"  and about 3/4-1"  wide piece of sturdy paper.
Apply a thin layer of glue, smear with your finger.
Glue the strip onto the spine of the notepad.
Smooth the strip onto the photo with your finger, then bend the other side down onto the back cover and smooth that down. 
*If excess glue gets onto the face of the photos, wipe it away with a damp paper towel.


STEP FIVE: LET EM DRY

Stack the books onto and let em dry :)


I was amazed at how easy it was to make these. This is defiantly going to be a gift item in the future.

Thursday, May 26, 2011

Doughnuts Galore!!


makes 1 dozen doughnuts


1 (1/4-oz) package active dry yeast (2 1/2 teaspoons)
2 tablespoons warm water (105–115°F)
3 1/4 cups all-purpose flour plus additional for sprinkling and rolling out dough
1 cup whole milk at room temperature
1/2 stick (1/4 cup) unsalted butter, softened
3 large egg yolks
2 tablespoons sugar
1 1/2 teaspoons salt
1/2 teaspoon cinnamon
About 10 cups vegetable oil for deep frying


Stir together yeast and warm water in a small bowl until yeast is dissolved. Let stand until foamy, about 5 minutes. (If yeast doesn’t foam, discard and start over with new yeast.)

Mix together flour, milk, butter, yolks, sugar, salt, cinnamon, and yeast mixture in mixer at low speed until a soft dough forms. Increase speed to medium-high and beat 3 minutes more.
Scrape dough down side of bowl (all around) into center, then sprinkle lightly with flour (to keep a crust from forming). Cover bowl with a clean kitchen towel (not terry cloth) and let dough rise in a draft-free place at warm room temperature until doubled in bulk, 1 1/2 to 2 hours. (Alternatively, let dough rise in bowl in refrigerator 8 to 12 hours.)

Turn dough out onto a lightly floured surface and roll out with a lightly floured rolling pin into a 12-inch round (1/2 inch thick). Cut out as many rounds as possible with 3-inch cutter, then cut a hole in center of each round with 1-inch cutter and transfer doughnuts to a lightly floured large baking sheet. Cover doughnuts with a clean kitchen towel and let rise in a draft-free place at warm room temperature until slightly puffed, about 30 minutes (45 minutes if dough was cold when cutting out doughnuts).

Do not reroll scraps.

Heat 2 1/2 inches oil in a deep 4-quart heavy pot until it registers 350°F on thermometer. Fry doughnuts, 2 at a time, turning occasionally with a wire or mesh skimmer or a slotted spoon, until puffed and golden brown, about 2 minutes per batch. Transfer to paper towels to drain. (Return oil to 350°F between batches.)
I also fried the doughnut holes for about 1 minute and them tossed them in powdered sugar and cinnamon sugar straight out of the hot grease.


Gourmet, December 2006 and Joy the baker


Chocolate Glaze

recipe from Alton Brown

1/2 cup unsalted butter
1/4 cup whole milk, warmed
1 tablespoon light corn syrup
2 teaspoons vanilla extract
4 ounces bittersweet chocolate, chopped
2 cups confectioners’ sugar, sifted

  
Combine butter, milk, corn syrup, and vanilla in medium saucepan and heat over medium heat until butter is melted. Decrease the heat to low, add the chocolate, and whisk until melted. Turn off heat, add the powdered sugar, and whisk until smooth. Place the mixture over a bowl of warm water and dip the doughnuts immediately. Allow glaze to set for 30 minutes before serving.

*You can add sprinkles and other yummy toppings.

Friday, April 22, 2011

Cinnamon Pull-Apart Bread

 I came across this recipe from Joy Baker during one of my random cravings to bake something for the family. Ive always been a big cinnamon raisin bread girl, unfortunately I had none at the time I made this but a lemon type frosting sounds good too; maybe next time.

INGREDIENTS:

Dough:
2 3/4 cups all-purpose flour
1/4 cup granulated sugar
2 1/4 tsp. instant yeast
1/2 tsp salt
4tbsp. unsalted softened butter
1/3 cup whole milk * I used 2% milk
1/4 cup warm water
1 tsp. vanilla extract
2 room temp large eggs

Filling:
4 tbsp. unsalted butter
1 cup sugar
2 tsp ground cinnamon
1/2 tsp grated nutmeg


To make the dough, combine flour, sugar, yeast and salt in a bowl with dough hook. Combine the butter and milk in a small saucepan, heat until the butter is melted. Set aside and let cool until the temp is 115- 125*F. Add the milk mixture,water,vanilla and eggs to mixing bowl. Mix on low speed until dough forms. Continue to knead until smooth and elastic, adding additional flour as need (1 tbsp at a time) until the dough no longer sticks to the side of the bowl and is tacky NOT sticky. Knead about 3-5 minutes. Transfer the dough to a lightly oiled bowl, turning once to coat and cover. Let rise in a warm place for about 1 hour or until it doubles in size.

*while dough rises add the butter to a small saucepan and melt until browned. Set aside. Combine the sugar, cinnamon and nutmeg in a small bowl and mix well.

Transfer dough to LIGHTLY floured surface and gently deflate. roll into a ball, cover and rest for another 5 minutes. Roll out into a 12x20 rectangle. Brush dough with browned butter
 Sprinkle cinnamon sugar mixture over the dough (yes ALL of it) in an even layer. Slice dough vertically into 6 even strips.
 Stack the strips on top of each other and then slice again into 6 slices.
 Place into a lightly greased (make sure to grease well) 9x5 loaf pan. Cover with clean towel and sit for 30-45 minutes.
Preheat oven to 350*F. Bake 30-35 minutes, until the top is golden brown. Remove from oven and let rest for 20-30 minutes. Run knife around the edges to loosen and carefully turn the loaf out, transferring to serving plate. Serve warm but also taste yummy the day after ( it has a cinnamon toast crunch flavor to it)
 Absolutely delish and if I wasn't making Ice Box cookies now, I would make this today too. Take a try at this recipe and let me know how it turns out.